What We Offer
Communication guidance with different brand inverter
Felicitysolar Inverter
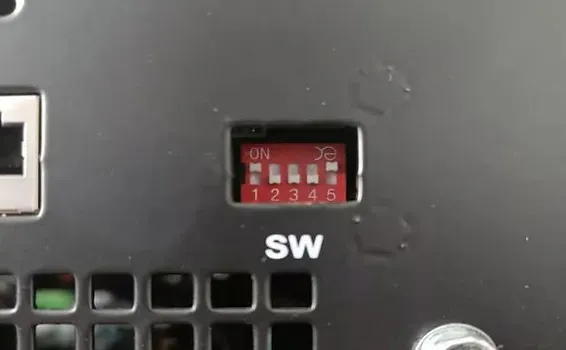
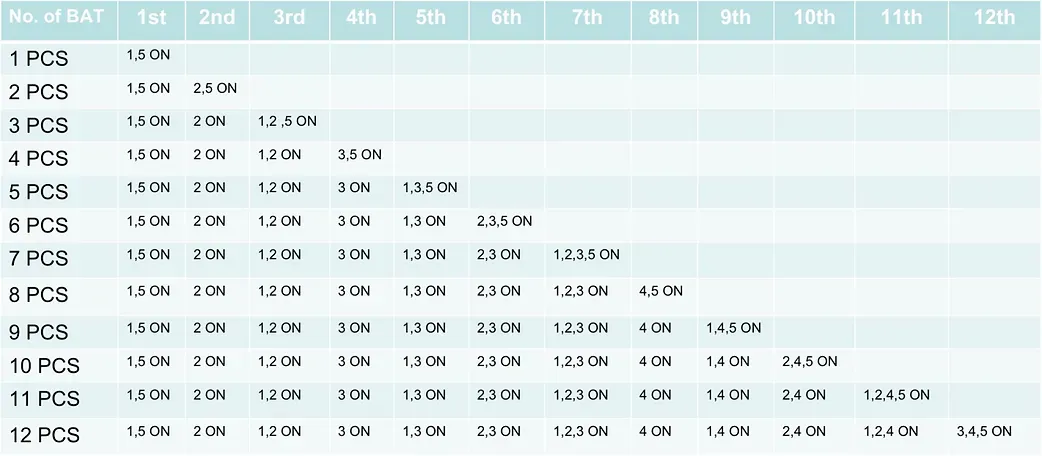
a) Switch the battery DIP dialed first Switch the battery DIP dialed first,
The specific dialing situation is shown as below.
a) Prepare a communication cable:
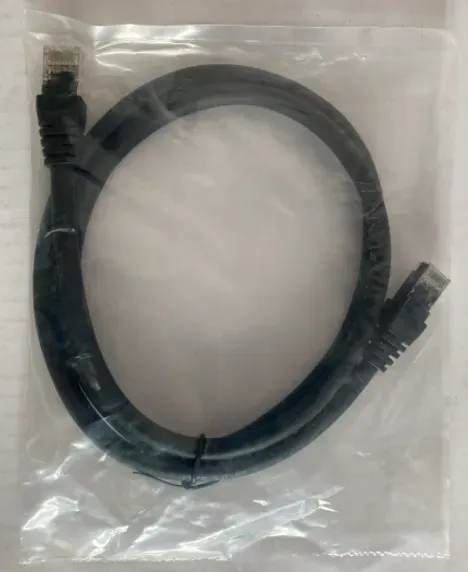
The communication cable is a black cable in the battery box.
If the cable is too short, you can make it yourself,
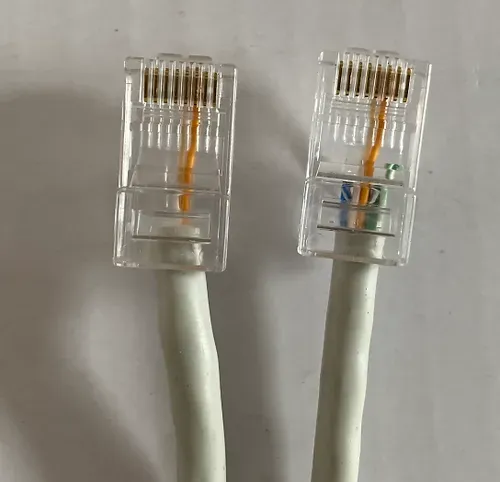
The pin out of the cable is 5,6→5,6.
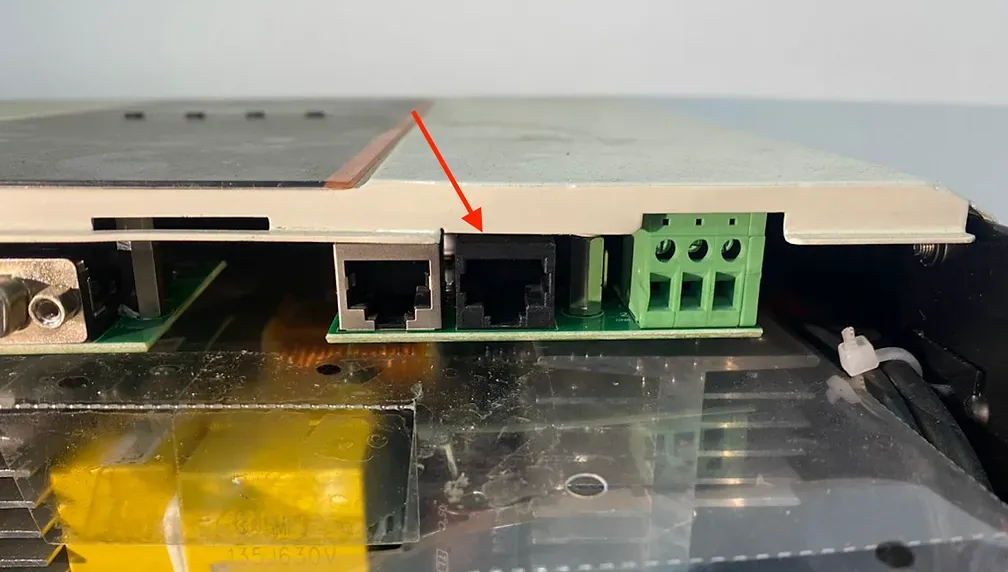
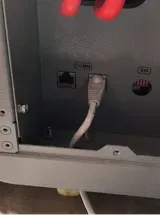
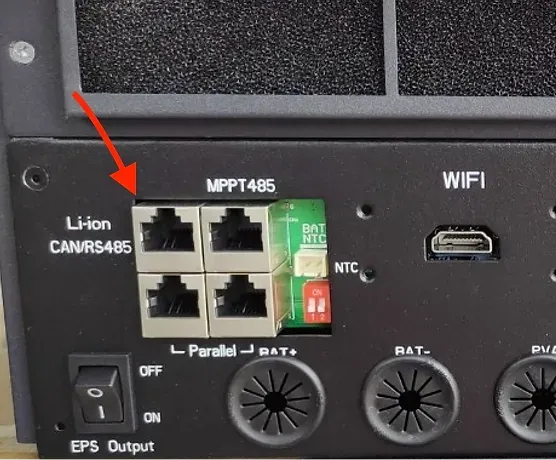
b) Plug one side of the communication cable on BMS port on Felicitysolar inverter, plug the other side of the communication cable on any communication port on Felicitysolar battery.
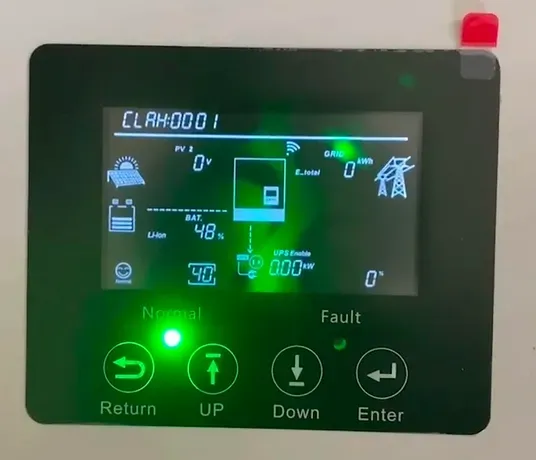
c) Sign of successful communication: "C" appear on the display screen on the inverter
Deye Inverter
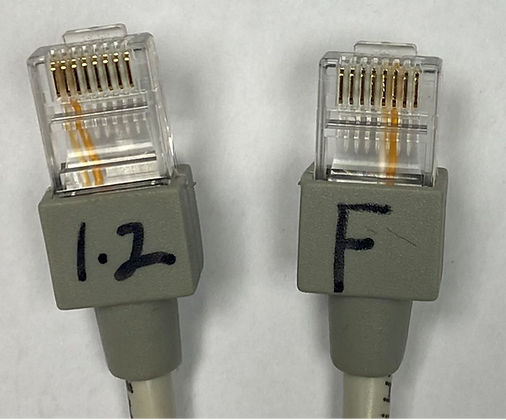
1) Prepare a communication cable:
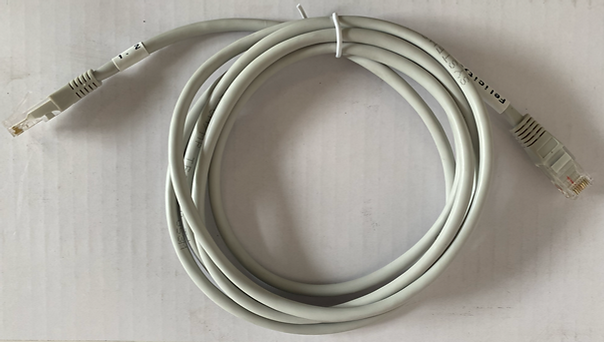
You can ask for the communication cable from our distributor, it’s a cable like the left image below ( it’s also the same cable to communicate with Sunsynk, Growatt, Luxpower inverter).
If the cable is too short, you can make it yourself,
The pin out of the cable is 5,6(Battery)→1,2(Inverter)
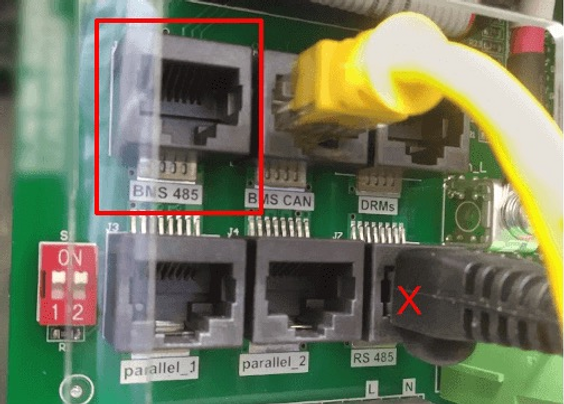
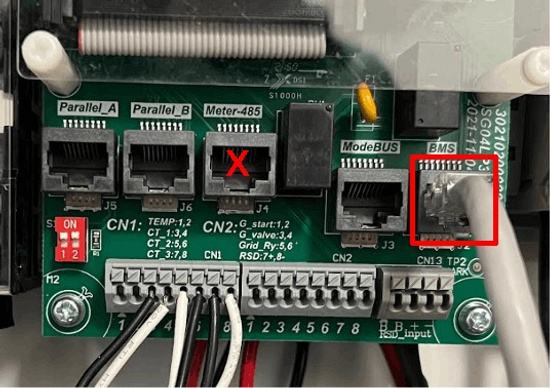
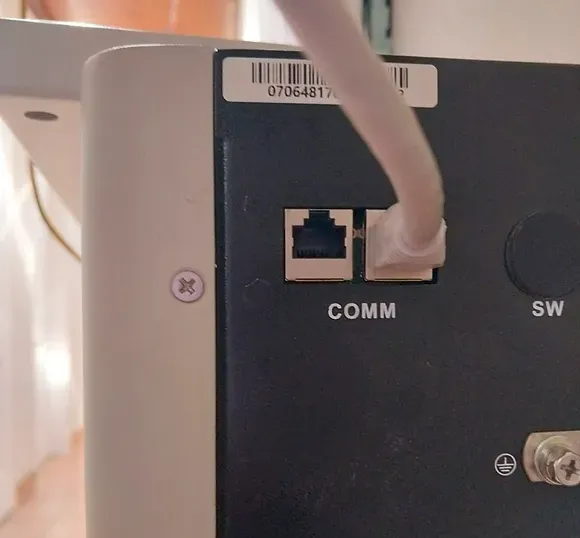
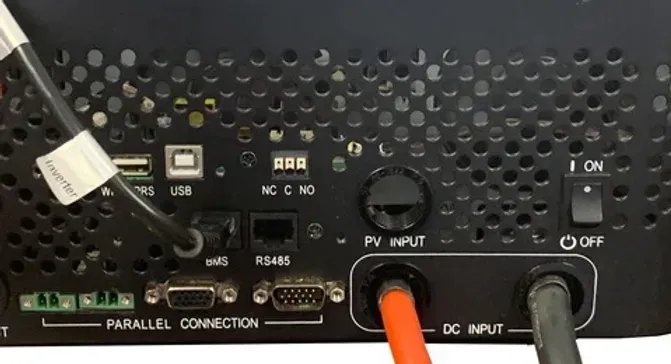
2) Plug one side(pin 1,2) of the communication cable on RS485 or BMS port on Deye inverter, plug the other side of the communication cable(namely pin 5,6) on any communication port on Felicitysolar battery.

3) Check the version of Deye inverter.
If the inverter is a single-phase, upgrade the version to 1001-C35D; if the inverter is a three-phase, upgrade the version to 1001-C031.
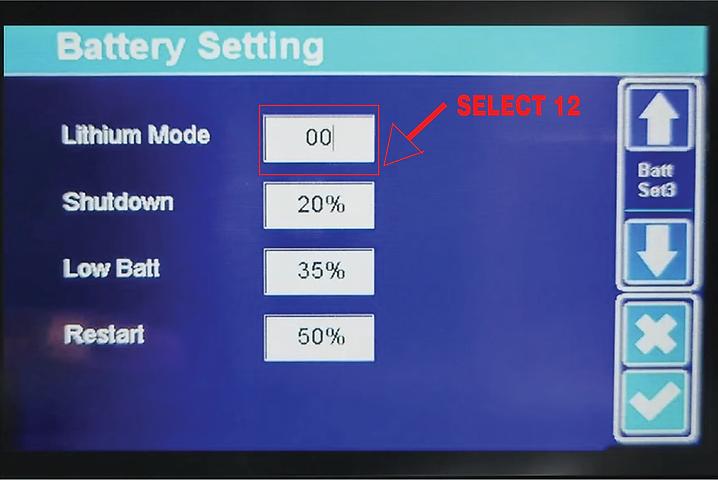
4) Setting steps on inverter: SAT→BATTERY
→SETTING→LITHIUM→LITHIUM MODE→12
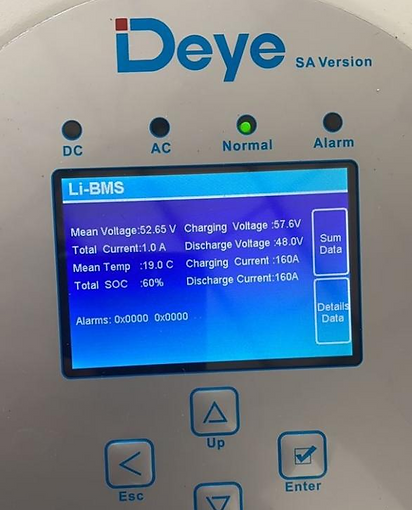
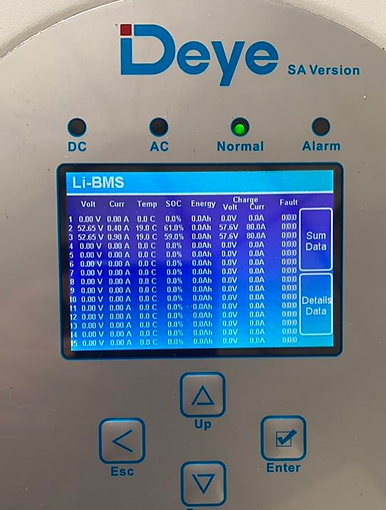
5) Sign of successful communication: The batteres info appears on Li-BMS page on inverter
Sunsynk Inverter
a) Prepare a communication cable: you can ask for the communication cable from our distributor, it’s a cable like the left image below ( it’s also the same cable to communicate with Deye, Growatt, Luxpower inverter). If the cable is too short, you can make it yourself, the pin out of the cable is 5,6(Battery)→1,2(Inverter)
b) Plug one side(pin 1,2) of the communication cable on RS485 or BMS port on Sunsynk inverter, plug the other side of the communication cable(namely pin 5,6) on any communication port on Felicitysolar battery.
Battery RS485/BMS Port on Deye/Sunsynk Inverter
Communication Port on Felicitysolar Battery
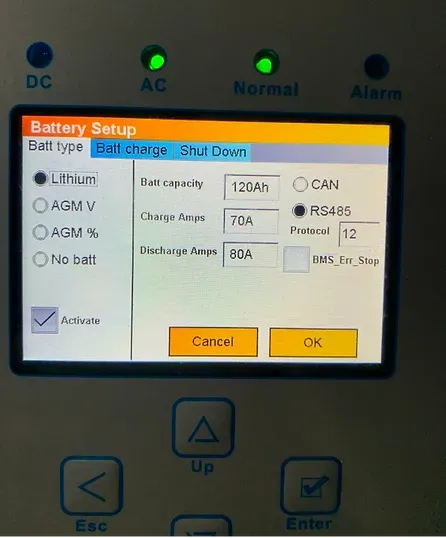
c) Setting steps on inverter: Bat Setting→Lithium→RS485, Protocol 12
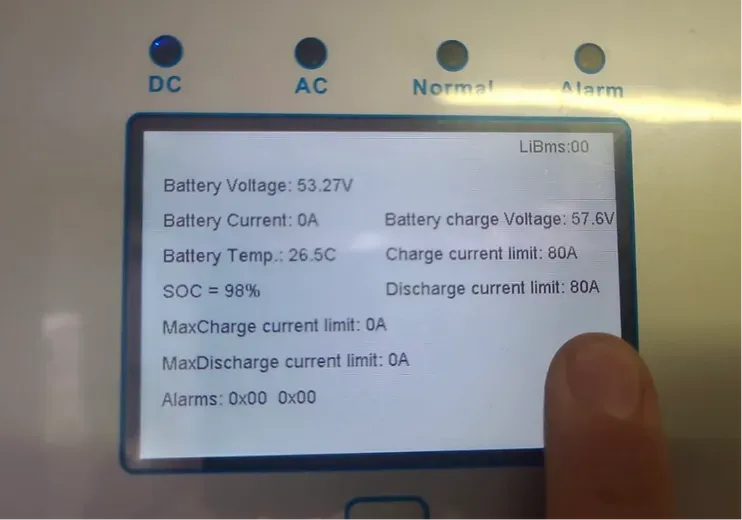
d) Sign of successful communication: Can check the Discharge current limit on Bat Page
Growatt Inverter
- Prepare a communication cable: you can ask for the communication cable from our distributor, it’s a cable like the left image below ( it’s also the same cable to communicate with Deye, Sunsynk, Luxpower inverter). If the cable is too short, you can make it yourself, the pin out of the cable is 5,6(Battery)→1,2(Inverter
Battery BMS Port on Growatt Inverter
2) Plug one side(pin 1,2) of the communication cable on BMS port on Growatt inverter, plug the other side of the communication cable(namely pin 5,6) on any communication port on Felicitysolar battery.
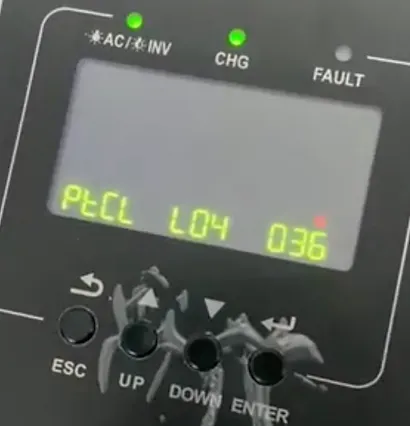
3) Setting steps on inverter: Setting→005→Li→036→L04.
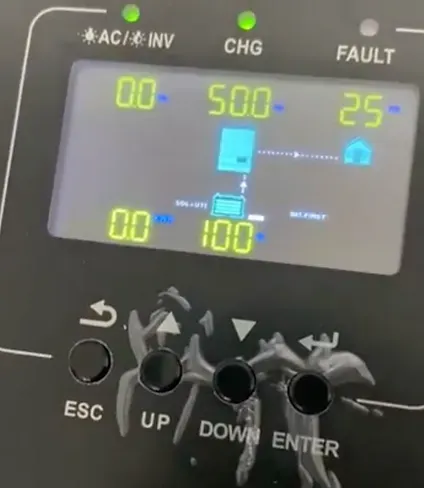
4) Sign of successful communication: Can check the battery SOC on inverter
Luxpower Inverter
a) Prepare a communication cable: you can ask for the communication cable from our distributor, it’s a cable like the left image below ( it’s also the same cable to communicate with Deye,Sunsynk, Growatt inverter).
If the cable is too short, you can make it yourself, The pin out of the cable is 5,6(Battery)→1,2(Inverter)
Battery RS485 Port on Luxpower Inverter
b) Plug one side(pin 1,2) of the communication cable on RS485 port on Luxpower inverter, plug the other side of the communication cable(namely pin 5,6) on any communication port on Felicitysolar battery.
Battery RS485 Port on Luxpower Inverter
c) Setting steps on inverter: Setting→3→Li-ion→0
d) Sign of successful communication:
Can check the battery SOC on inverter
Voltronic/kodak/RTC Inverter
List of Services
-
1. Prepare a communication cable: you can make it yourself, the pin out of the cable is 5,6(Battery)→3,5(Inverter)List Item 1
-
2. Plug one side(pin 1,2) of the communication cable on BMS port on these brand inverter, plug the other side of the communication cable(namely pin 5,6) on any communication port on Felicitysolar battery.List Item 2
-
3. Setting steps on inverter: Setting→14→PYL.List Item 3
-
4. Sign of successful communication: Can check the battery SOC on inverterList Item 4
